Conquer Your Spreadsheet: Obliterate Empty Rows in Excel
Ever opened a massive spreadsheet and felt overwhelmed by a sea of nothingness? Blank rows scattered throughout your data can be a real pain, making it harder to analyze, sort, and generally make sense of your information. But fear not, fellow spreadsheet traveler, because taming these empty rows is easier than you think. This guide is your passport to a cleaner, more efficient Excel experience, focusing solely on how to eliminate those pesky blank rows.
Dealing with data in Excel often involves wrestling with formatting issues, and blank rows are a common culprit. They can crop up when importing data from other sources, after deleting cell contents, or simply from accidental insertions. Left unchecked, these empty rows can throw off calculations, mess with sorting, and make your spreadsheet look unprofessional. Learning how to eradicate them is essential for anyone working with Excel.
The ability to erase empty rows has been a core feature of Excel for a long time. As spreadsheet software evolved, so did the need for tools to manage data efficiently. Removing blank rows isn't just about aesthetics; it's about data integrity and usability. Think of it as decluttering your digital workspace – a crucial step towards maximizing your productivity.
One of the biggest headaches blank rows create is with sorting and filtering. Imagine trying to analyze sales data and having your results skewed by empty rows scattered throughout. They can also lead to errors in formulas and functions, potentially leading to inaccurate calculations. This guide will help you avoid these pitfalls and keep your data squeaky clean.
Clearing out blank rows isn't just a matter of making your spreadsheet look pretty; it's about preparing your data for effective analysis. Imagine trying to create a chart with hundreds of blank rows interspersed with your data. A mess, right? By eliminating these empty spaces, you pave the way for accurate insights and better decision-making.
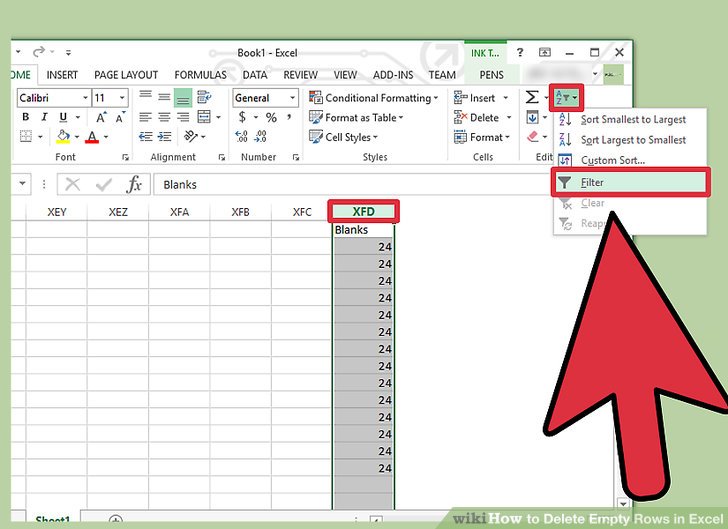
Removing blank rows in Excel can be accomplished through several methods. You can use the "Go To Special" dialog box, filtering, sorting, or even VBA code for automated solutions. Each method has its strengths and is suited to different situations.
For example, using "Go To Special" is a quick way to select all blank rows and delete them in one go. Filtering allows you to isolate blank rows and delete them within a specific data range. Sorting enables you to move all blank rows to the top or bottom of your sheet for easy removal. These various techniques give you flexibility and control over your data cleansing process.
Benefits of purging blank rows include improved data analysis accuracy, streamlined spreadsheet appearance, and reduced file size. For instance, removing empty rows can make it easier to create accurate charts and pivot tables. A cleaner spreadsheet also simplifies navigation and improves readability. And a smaller file size means faster loading times and improved overall performance.
To delete blank rows using "Go To Special," select the data range, press F5, click "Special," select "Blanks," and then click "OK." This selects all blank rows. Next, right-click on a selected row and choose "Delete." This will permanently remove the empty rows from your spreadsheet.
Advantages and Disadvantages
| Advantages | Disadvantages |
|---|---|
| Improved Data Integrity | Potential for accidental data deletion if not careful |
| Enhanced Spreadsheet Readability | Requires understanding of different removal methods |
| Smaller File Size | Can be time-consuming for very large datasets |
Best Practices:
1. Always save a copy of your original file before deleting rows.
2. Double-check your selection before deleting to avoid accidental data loss.
3. Consider using filters for more complex scenarios.
4. Explore VBA for automating repetitive tasks.
5. Test your formulas after removing rows to ensure data integrity.
Frequently Asked Questions:
1. How do I delete only entirely blank rows? Use "Go To Special" with the "Blanks" option.
2. Can I undo deleting blank rows? Yes, using Ctrl+Z or the undo button.
3. What if my data has hidden rows? Unhide rows before deleting blank rows.
4. Is there a way to automate deleting blank rows? Yes, using VBA code.
5. How do I delete blank rows within a specific range? Use filtering or sorting.
6. What if I accidentally delete data? Restore from a backup copy.
7. How do I delete blank rows in a protected sheet? Unprotect the sheet first.
8. Can I delete blank rows in a table? Yes, the same methods apply.
So, there you have it! You've now got the knowledge and tools to conquer those pesky blank rows and transform your Excel spreadsheets into well-oiled machines of efficiency. Remember, eliminating blank rows is more than just a cosmetic fix. It's about improving data accuracy, streamlining analysis, and ultimately making better decisions. From simple techniques like "Go To Special" to advanced VBA scripting, you have a range of options to choose from. So, take control of your spreadsheets and start purging those empty rows today! It will make a world of difference in your data analysis journey, allowing you to focus on the information that truly matters. Embrace the power of a clean spreadsheet, and watch your productivity soar. Now go forth and declutter!
Exploring our solar system through drawings
Sierra damansara semi d dream homes up for grabs
Unlocking per niente in inglese your guide to youre welcome and more


