Excel's Vanishing Act: Obliterate Empty Rows Like a Spreadsheet Ninja
Ever stare at a spreadsheet riddled with gaping holes of nothingness? Those blank rows, lurking between precious data, can be more than just an eyesore. They mess with calculations, sorting, and generally make your Excel life a misery. But fear not, fellow data wranglers! We're about to unveil the secrets to making those empty rows vanish, leaving you with a clean, pristine spreadsheet ready for action.
Dealing with empty rows is a tale as old as spreadsheets themselves. From the early days of Lotus 1-2-3 to the modern reign of Excel, blank rows have been the bane of analysts, accountants, and anyone who's ever wrestled with a dataset. Why are they such a problem? Well, they throw off formulas that rely on contiguous ranges, make charts look wonky, and generally make it harder to analyze your data. Luckily, there's a whole arsenal of techniques to eradicate them.
The importance of eliminating blank rows can't be overstated. A clean dataset is a happy dataset. Removing these gaps improves the accuracy of calculations, simplifies data analysis, and makes your spreadsheets look significantly more professional. Imagine presenting a report with a perfectly formatted, concise dataset compared to one littered with empty rows. The difference is night and day.
One common issue arises when you're importing data from other sources. Often, these imports come with unwanted blank rows that need to be dealt with. Another issue is when users manually delete cell contents without removing the entire row, leaving behind invisible formatting that can still cause problems.
So, how do you actually perform this digital magic trick of row removal? There's not just one method, but a whole toolbox of techniques! You can use built-in Excel features like filtering and sorting, or unleash the power of formulas to identify and delete those empty lines. Let's explore some of these powerful tools.
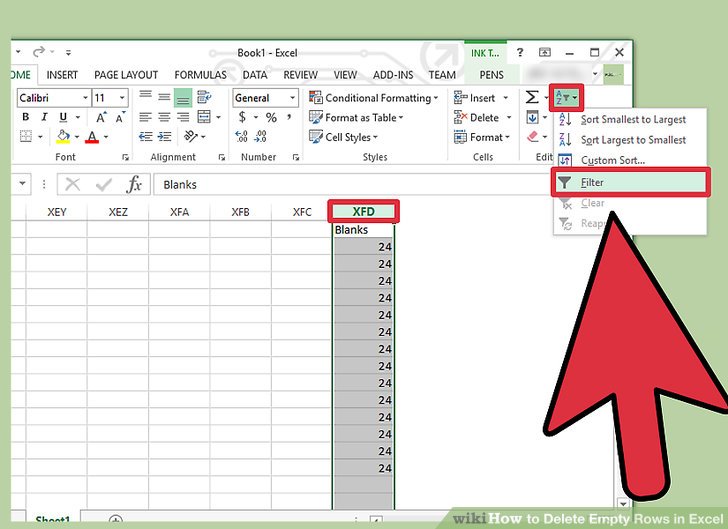
One powerful method involves using the `FILTER` function (for Excel 365 and later). This allows you to create a new range containing only the rows that meet a specific criteria, effectively excluding the blank rows. Another option is using `Go To Special` to select blank rows and then delete them directly. A more advanced technique involves using formulas like `ROW()` and `INDIRECT()` to create dynamic ranges that automatically exclude empty rows.
Benefits of a blank-row-free spreadsheet: 1. Improved Accuracy: No more skewed calculations due to unexpected gaps. 2. Easier Analysis: Cleaner data makes it easier to spot trends and insights. 3. Professional Presentation: Impress your colleagues and clients with polished spreadsheets.
Action plan: 1. Identify the methods best suited for your needs. 2. Implement the chosen method. 3. Verify the results and refine as needed.
Checklist: 1. Backup your data before making any changes. 2. Choose the appropriate row removal method. 3. Double-check your results.
Step-by-step guide for using `Go To Special`: 1. Select the data range. 2. Go to Home > Find & Select > Go To Special. 3. Choose Blanks. 4. Click Delete > Delete Rows.
Advantages and Disadvantages
| Advantages | Disadvantages |
|---|---|
| Clean Data | Potential data loss if not careful |
| Improved Calculations | Can be time-consuming for very large datasets |
Best Practices: 1. Always backup your data. 2. Test your method on a small sample first. 3. Use the most efficient method for your data size. 4. Be mindful of hidden formatting. 5. Understand the implications of your chosen method.
Real Examples: 1. Cleaning customer data imported from a CRM. 2. Preparing financial reports. 3. Analyzing survey results. 4. Formatting data for mail merges. 5. Creating dynamic dashboards.
Challenges and Solutions: 1. Hidden formatting: Use `Clear All` to remove it. 2. Large datasets: Consider using VBA or Power Query. 3. Complex formulas: Adjust formulas to accommodate the changes. 4. Accidental deletion: Use undo or restore from backup. 5. Data validation: Re-apply validation rules after removing rows.
FAQ: 1. How do I remove blank rows in Excel? 2. What's the fastest way to delete empty rows? 3. Can I remove blank rows with a formula? 4. How do I avoid deleting data accidentally? 5. What's Go To Special? 6. What about hidden formatting? 7. How do I deal with large datasets? 8. Can I undo row deletion?
Tips & Tricks: Use keyboard shortcuts to speed up the process. Experiment with different methods to find what works best for you. Consider using VBA for automating complex tasks.
In conclusion, removing blank rows in Excel isn't just about aesthetics; it's about data integrity, efficiency, and professionalism. Mastering these techniques, from simple filtering to advanced formulas, empowers you to wield your spreadsheets with surgical precision. By eliminating the clutter of empty rows, you pave the way for clearer insights, more accurate analysis, and a more streamlined workflow. So, banish those blank rows and unlock the true potential of your data! Take control of your spreadsheets, explore the various methods available, and transform your data from chaotic to clean, efficient, and insightful. Don't let those empty rows hold you back any longer. Start streamlining your data today!
Exploring the versatility of kim soo hyun and kim so hyun two actresses one stage name
Ndr programm live ansehen
Dafont free fonts for tattoos a world of ink spiration


