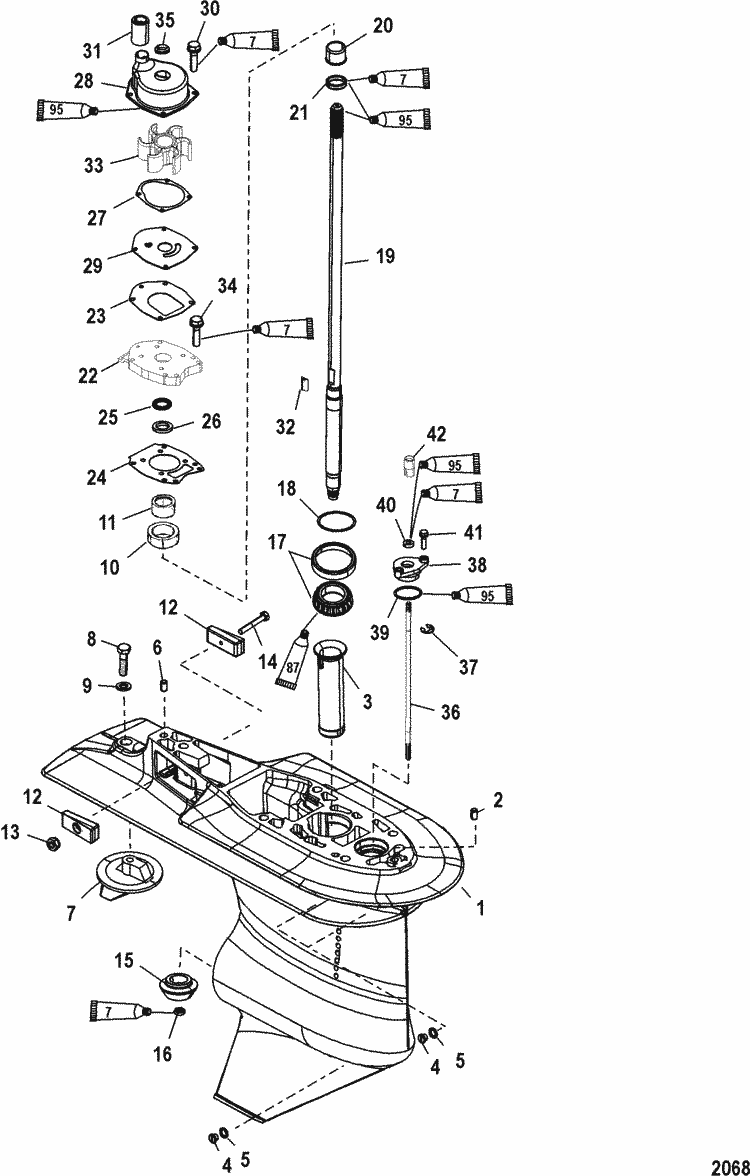
Suzuki 115 Outboard Impeller: Essential Maintenance for Peak Performance
Is your Suzuki 115 outboard engine overheating? A failing impeller might be the culprit. This critical component is often overlooked, yet it plays a vital role in your engine's cooling system. Understanding the importance of regular Suzuki 115 outboard impeller changes and how to perform the replacement yourself can save you time, money, and potential engine damage.
The impeller for a Suzuki 115 outboard is a small, rubber component located within the lower unit water pump. Its function is to draw cooling water from the lake, river, or ocean and circulate it through the engine block, preventing overheating. Over time, the impeller vanes can wear down, crack, or become brittle due to exposure to heat, chemicals, and general wear and tear. A damaged impeller restricts water flow, leading to increased engine temperatures and potentially catastrophic engine failure.
Changing a Suzuki 115 outboard impeller isn't as daunting as it may seem. With the right tools and a little patience, most boat owners can tackle this maintenance task themselves. Regularly servicing your outboard’s impeller ensures optimal cooling system performance and extends the life of your engine. This proactive approach can save you from costly repairs down the line and keep you on the water enjoying your boating adventures.
Neglecting this crucial maintenance task can lead to a variety of issues. Overheating can warp engine components, leading to costly repairs. A failing impeller can also cause a loss of power and decreased fuel efficiency. Recognizing the signs of a failing impeller is crucial for preventing further damage. These signs include overheating, weak telltale stream, and steam from the engine.
While accessing the impeller housing varies slightly between different Suzuki 115 outboard models, the general process is similar. You'll need a few basic tools, including a new impeller kit (which usually includes gaskets and o-rings), a container to catch spilled gear oil, screwdrivers, and potentially a gear lube pump. Before beginning, consult your owner's manual for specific instructions pertaining to your outboard model.
One of the primary benefits of replacing your Suzuki 115 outboard impeller regularly is preventing engine damage caused by overheating. Another advantage is improved fuel efficiency, as a properly functioning cooling system allows the engine to operate at its optimal temperature. Lastly, regular maintenance like impeller replacement helps maintain the resale value of your boat.
Step-by-step Suzuki 115 Outboard Impeller Replacement:
1. Disconnect the fuel line and remove the lower unit drain screws to drain the gear oil.
2. Remove the lower unit from the outboard.
3. Locate and remove the water pump housing.
4. Carefully remove the old impeller and inspect the housing for any debris or damage.
5. Install the new impeller, ensuring it is seated correctly. Lubricate the impeller with water or glycerin before installation.
6. Reassemble the water pump housing and lower unit, replacing all gaskets and seals.
7. Refill the lower unit with the recommended gear oil.
8. Reconnect the fuel line and test the engine for proper water flow.
Advantages and Disadvantages of DIY Impeller Replacement
| Advantages | Disadvantages |
|---|---|
| Cost savings | Potential for errors |
| Increased knowledge of your engine | Time commitment |
| Convenience of doing it yourself | Need for specific tools |
Best Practices:
1. Always use a new impeller kit with gaskets and seals.
2. Lubricate the new impeller before installation.
3. Inspect the water pump housing for damage.
4. Consult your owner's manual for specific instructions.
5. Test the engine thoroughly after replacement.
Frequently Asked Questions:
1. How often should I replace my Suzuki 115 outboard impeller? Generally, every 2-3 years or more frequently if used in harsh conditions.
2. What are the signs of a failing impeller? Overheating, weak telltale stream, and steam.
3. Can I reuse the old gaskets? No, always use new gaskets.
4. What type of gear oil should I use? Consult your owner's manual.
5. How do I test the water flow? Start the engine and observe the telltale stream.
6. What tools do I need? Screwdrivers, socket set, gear lube pump, container.
7. Where can I buy a replacement impeller? Marine supply stores, online retailers.
8. What if I'm not comfortable doing it myself? Take your outboard to a certified marine mechanic.
Tips and Tricks: Take photos during disassembly to aid in reassembly. Keep spare impellers on board for emergencies.
In conclusion, regular Suzuki 115 outboard impeller maintenance is paramount for the longevity and performance of your engine. While the task might seem intimidating at first, with the right information and a bit of preparation, replacing the impeller is a manageable DIY project for many boat owners. By understanding the importance of a functioning impeller, recognizing the signs of failure, and following the proper replacement procedures, you can keep your Suzuki 115 outboard running smoothly for years to come. Investing the time and effort in this preventative maintenance will not only save you money on potential repairs but also ensure countless hours of uninterrupted enjoyment on the water. Don’t wait until it's too late – prioritize your outboard’s health and schedule your impeller replacement today.
Mastering the do and does dance in english grammar
Finding calm with farrow and ball shadow white
Unlocking the value exploring the fifa 23 messi card price


