Taming Your Data: Conquer Blank Rows in Excel
Let's face it: a spreadsheet riddled with blank rows is like a cluttered room – it's hard to find anything and even harder to work efficiently. In the world of data analysis, clean data is king. Removing blank rows in Excel is a fundamental skill that can significantly impact your productivity and the accuracy of your analysis. Whether you're dealing with a small dataset or a massive spreadsheet, understanding how to efficiently purge those empty rows is crucial.
Think of your Excel spreadsheet as a digital garden. Blank rows are like weeds choking the life out of your valuable data. Just like weeding a garden, eliminating blank rows allows your data to flourish, making analysis easier and more accurate. But how did we get to a point where purging blank rows became such a critical task?
The rise of big data and the increasing reliance on spreadsheets for data manipulation have contributed to the prevalence of blank rows. Data imported from various sources, manual data entry errors, and complex calculations can all lead to the creation of these empty spaces. Historically, dealing with blank rows involved tedious manual deletion, but thankfully, Excel has evolved to provide more streamlined solutions.
The importance of eliminating blank rows cannot be overstated. These empty rows can skew calculations, create inaccurate charts, and make it difficult to navigate your data. Imagine trying to analyze sales figures when your spreadsheet is littered with empty rows. Your SUM formulas could be thrown off, and your charts might misrepresent the actual trends.
Before we dive into the how-to, let's define what constitutes a "blank row" in Excel. A blank row is any row that doesn't contain data in any of its cells. This includes rows that might appear blank but contain hidden formatting or formulas that return empty strings. Removing these seemingly empty rows is just as important as removing those that are visibly empty.
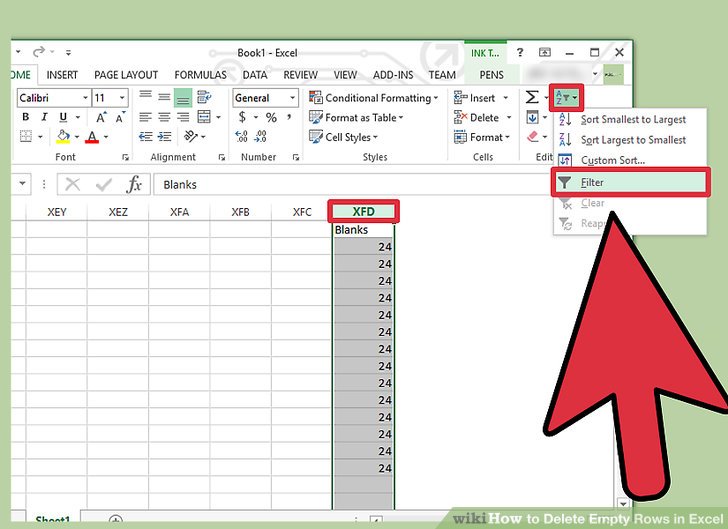
One of the simplest methods is to manually select the blank rows and delete them. However, this becomes impractical with large datasets. A more efficient approach is using Excel's "Go To Special" feature, which allows you to select all blank rows at once. Alternatively, sorting your data can group the blank rows together for easier deletion. More advanced users might leverage filtering or VBA macros for automated blank row removal.
Benefits of Removing Blank Rows:
1. Improved Data Analysis: Cleaner data leads to more accurate calculations and more insightful analysis. For example, removing blank rows ensures that your SUM functions only include relevant data points.
2. Enhanced Spreadsheet Performance: Large spreadsheets with numerous blank rows can become sluggish. Removing these rows can significantly improve the responsiveness of your spreadsheet.
3. Professional Presentation: A clean, organized spreadsheet presents a more professional image, especially when sharing your work with colleagues or clients.
Step-by-Step Guide to Removing Blank Rows Using "Go To Special":
1. Select the entire data range.
2. Press F5 (or Ctrl+G) to open the "Go To" dialog box.
3. Click "Special."
4. Select "Blanks" and click "OK."
5. Right-click on one of the selected blank rows.
6. Choose "Delete" and then "Entire row."
Advantages and Disadvantages of Different Blank Row Removal Methods
| Method | Advantages | Disadvantages |
|---|---|---|
| Manual Selection | Simple for small datasets | Time-consuming for large datasets |
| Go To Special | Efficient for most datasets | May not work with hidden data |
| Filtering | Allows selective removal | Requires filtering setup |
FAQ:
1. What if my data contains hidden formulas in seemingly blank rows? Use the "Go To Special" method to target all blanks, including cells with formulas that return empty strings.
2. Can I undo deleting blank rows? Yes, use the Ctrl+Z shortcut to undo the deletion.
3. What if I accidentally delete rows with data? Save a copy of your spreadsheet before performing any row deletion.
4. How can I prevent blank rows from being created in the first place? Validate data entry and use data cleaning techniques.
5. Are there any add-ins for removing blank rows? Yes, several add-ins offer enhanced features for spreadsheet cleanup.
6. Can VBA macros automate blank row removal? Yes, VBA macros can automate complex deletion tasks.
7. What if I only want to delete blank rows within a specific range? Select the specific range before applying the chosen removal method.
8. Does removing blank rows affect formulas referencing other cells? Yes, deleting rows shifts cell references. Adjust formulas accordingly.
Tips and Tricks: Always save a backup before manipulating your data. Explore different methods to find the best fit for your specific needs. Consider using VBA macros for recurring tasks.
In conclusion, removing blank rows in Excel is an essential skill for anyone working with data. From ensuring accurate calculations to enhancing spreadsheet performance, the benefits are numerous. By mastering techniques like "Go To Special" and exploring advanced options like filtering and VBA, you can streamline your workflow and gain greater control over your data. Taking the time to clean your data is an investment that pays off in increased productivity and more reliable insights. So, embrace the power of a clean spreadsheet, and watch your data analysis soar. Start eliminating those blank rows today and unlock the full potential of your Excel spreadsheets! A clean spreadsheet is a happy spreadsheet, and a happy spreadsheet makes for a happy analyst.
Hydrochloric acid disposal a safe and simple guide
Unlocking global connections the power of language and culture
Unlocking the secrets of ps99 a guide to finding key parts


